Estimated reading time: 16 minutes
Gain staging and the integration of analog hardware in modern DAW systems
Introduction
-18 dBFS is the new 0 dBu:
In practice, however, even experienced engineers often have only a proximate idea of what “correct” levels are. Like trying to explain the offside rule in soccer, a successful level balance is simple and complex at the same time. Especially when you have the digital and analog worlds supposed to work together on equal grounds. This blog post offers concrete tips for confident headroom management and “how to integrate analog hardware in digital production environment – DAW systems” in a meaningful way.
Digital vs. Analog Hardware
A good thing is that you don’t have to choose one or the other. In modern music production, we need both worlds, and with a bit of know-how, the whole thing works surprisingly well. But the fact is: On one hand, digital live consoles and recording systems are becoming more and more compact in terms of their form factor, on the other hand, the number of inputs and outputs and the maximum number of tracks are increasing at the same time. The massive number of input signals and tracks demand even more to always find suitable level ratios.
Let’s start at the source and ask the simple question, “Why do you actually need a mic preamp?”
The answer is as simple as clear. We need a Mic-Preamp to turn a microphone signal into a line signal. A mixer, audio interface, or DAW always operates at line level, not microphone level. This is the case for all audio interfaces, such as insert points or audio outputs. How far do we actually need to turn up the microphone preamp, and is there one “correct” level? There is no universal constant with a claim to be the sole representative, but there is a thoroughly sensible recommendation that has proven itself in a practical workflow. I recommend to level all input signals to line level with the help of the microphone preamplifier. Line level is the sweet spot for audio systems.
But what exactly is line level now and where can it be read?
Now we’re at a point where it gets a little more complicated. For the definition of the line level, a reference level is used and this is different depending on which standard is used as a basis. The reference level for professional audio equipment according to the German broadcast standard is +6 dBu (1.55 Vrms, -9 dBFS). It refers to a level of 0 dBu at 0.775 V (RMS). In the USA, the analog reference level of +4 dBu, corresponding to 1.228 V (effective value), is used. Furthermore relevant in audio technology is the reference level of 0 dBV, corresponding to exactly 1 V (RMS) and the home equipment level (USA) with -10 dBV, corresponding to 0.3162 V (RMS). Got it? We’ll focus on the +4 dBu reference level in this blog post. Simply for the reason that most professional audio equipment relies on this reference level for line-level.
dBu & dBV vs. dBFS
What is +4 dBu and what does it mean?
Level ratios in audio systems are expressed in the logarithmic ratio decibel (dB). It is important to understand that there is a difference between digital and analog mixers in terms of “dB metering”. This is the experience of anyone who has swapped from an analog- to a digital mixer for the first time (or vice versa). Obviously, the usual level settings don’t fit anymore. Why is that? The simple explanation: analog mixers almost always use 0 dBu (0.775 V) as a reference point, while their digital counterparts use the standard set by the European Broadcasting Union (EBU) for digital audio levels. According to the EBU, the old analog “0 dBu” should now be equivalent to -18 dBFS (full scale). Digital consoles- and DAW users, therefore, hold fast: -18 dBFS is our new 0 dBu!
This sounds simple, but unfortunately, it’s not that easy, because dBu values can’t be unambiguously converted to dBFS. It varies from device to device which analog voltage leads to a certain digital level. Many professional studio devices are connoted with the nominal output of +4 dBu, while consumer devices tend to fall back on the dBV meter (-10 dBV). This is not enough confusion. There are also massive differences in terms of “headroom”. With analog equipment, there is still plenty of headroom available when a VU meter is operating in a 0 dB range. Often there is another 20 dB available until an analog soft clipping signals the end of the line. The digital domain is much more uncompromising at this point. Levels beyond the 0dBFS mark produce hard clipping, which sounds unpleasant on the one hand and represents a fixed upper limit on the other. The level simply does not get any louder.
We keep in mind: The analog world works with dBu & dBV indications, while dBFS describes the level ratios in the digital domain. Accordingly, the meter displays on an analog mixing console are also different compared to a digital console or DAW.
Analog meter indicators are referenced to dBu. If the meter shows 0 dB, this equals +4 dBu at the mixer output and we are happy about a rich headroom. A digital meter is usually scaled over the range of -80 to 0 dBFS, with 0 dBFS representing the clipping limit. To make a comparison, let’s recall: 0 dBu (analog) = -18 dBFS (digital). This is true for many digital devices, such as Yamaha digital mixers, but not all. ProTools, for example, works with the reference level of 0 dBu = -20 dBFS. We often find this difference when comparing European and US equipment. The good news is that we can live very well with this difference in practice. Two dB is not what matters in the search for the perfect level of audio signals.
Floating Point
But why do we need to worry about level ratios in a DAW at all? Almost all modern DAWs work with floating-point arithmetic, which provides the user with infinite headroom and dynamics (theoretically 1500 dB). The internal dynamics are so great that clipping cannot occur. Therefore, common wisdom on this subject is: “You can do whatever you want with your levels in a floating-point DAW, you just must not overdrive the sum output”. Theoretically true, but practically problematic for two reasons. First, there are plug-ins (often emulations of classic studio hardware) that don’t like it at all if you feed their input with extremely high levels.
This degrades the signal audibly. Very high levels have a second undesirable side effect: they make it virtually impossible to use analog audio hardware as an insert. Most common DAWs work with a 32-bit floating-point audio engine. Clipping can only occur on the way into the DAW (e.g. overdriven MicPre) or on the way out of the DAW (overdriven sum DA-converter). This happens faster than you think. Example: Anyone who works with commercial loops knows the problem. Finished loops are often normalized and you reach quickly the 0 dBFS mark on the loudest parts mark on your peak meter. If we play several loops simultaneously and two loops will reach 0 dBFS at one point at the same time, we already have clipping on the master bus. You need to avoid too high levels in a DAW at all costs.
Noise Generator
We’ve talked about clipping and headroom so far, but what about the other side of the coin? How do analog and digital audio systems handle very low levels? In the analog world, the facts are clear: the lower our signal level, the closer our useful signal approaches the noise floor. That means our “signal to noise” ratio is not optimal. Low signals enter the ring with the noise floor, which doesn’t come off without causing collateral damage to the sound quality. Therefore, in an analog environment, we must always emphasize solid levels and high-quality equipment with the best possible internal “signal to noise” ratio. This is the only way to guarantee that in critical applications (e.g. classical recordings, or music with very high dynamics) the analog recording is as noise-free as possible.
And digital?
Fader position as a part of Gain Staging
Another often overlooked detail on the way to a solid gain structure is the position of the faders. First of all, it doesn’t matter whether we’re working with an analog mixer, a digital mixer, or a DAW. Faders have a resolution, and this is not linear.
The resolution around the 0 dB mark is much higher than in the lower part of the fader path. To mix as sensitively as possible, the fader position should be near the 0 dB mark. If we create a new project in a DAW, the faders in the DAW project are in the 0 dB position by default. This is how most DAWs handle it. Now we can finally turn up the mic preamps and set the appropriate recording level. We recommend leveling all signals in the digital domain to -18 dBFS RMS / -9 dBFS peak. In other words, to the line-level already invoked at the beginning, because that’s what digital mixers and DAWs are designed for. Since we have the channel faders close to the 0 dB mark, the question now is: How do I lower signals that are too loud in the mix?
You have several ways to do this and many of them are simply not recommended. For example, you could turn down the gain of the mic preamp. But then we’re no longer feeding line level to the DAW. With an analog mixer, this results in a poor “signal to noise” ratio. A digital mixer with the same approach has the problem that all sends (e.g. monitor mixes for the musicians, insert points) also leave the line-level sweet spot. Ok, let’s just pull down the channel fader! But then we leave the area for the best resolution, where we can adjust the levels most sensitively. This may “only” be uncomfortable in the studio, but at a large live event with a PA to match, it quickly becomes a real problem.
This is where working in the fader sweet spot is essential. The ability to specifically make the lead vocal two dB louder via the fader is almost impossible if we start with a fader output setting of, let’s say, -50 dB. If we move the fader up just a few millimeters, we quickly reach -40 dB, which is an enormous jump in volume. The solution to this problem: We prefer to use audio subgroups for rough volume balancing. If these are not available, we fall back on DCA or VCA groups. The input signals are assigned to the subgroups (or DCAs or VCAs) accordingly. For example, one group for drums, one for cymbals, one for vocals and one each for guitars, keyboards and bass. With the help of the groups you can set a rough balance between the instruments and vocal signals and use the channel faders for small volume corrections.
Special tip: It makes sense to route effect returns to the corresponding groups instead of to the master. The drum reverb to the drum group, or the vocal reverb to the vocal group. If you have to correct the group volume, then the effect part is automatically pulled along and the ratio signal/effect part always remains the same.
Gain Staging in the DAW – the hunt for line level
As a first step, we need to clear up a misunderstanding. “Gain” and “Volume” are not members of the same family. Adjusting gain is not the same as adjusting volume. In simple words, Volume is the volume after processing, while Gain is the volume before processing. Or even simpler, Gain is input level, Volume is output level!
The next important step for clean gain staging is to determine what kind of meter display my digital mixer or DAW is even working with. Where exactly is line level on my meter display?
Many digital consoles and DAWs have hybrid metering. Like the metering in Studio One V5, which we’ll use as an example. The scaling going from -72 dB to +10 dB and from -80 dB to +6 dB in the sum output.
Studio One metering is between an analog dBu meter and a digital meter in dBFS in terms of its scaling. This is similar in many DAWs. It is important to know whether the meter display shows an RMS (average level) or Peak Meter (peak level). If we see only peak metering and control to line level (-18 dBFS), then the level is too low, especially for very dynamic source material with fast transients like a snare drum. The greater the dynamic range of a track, the higher the peak values and the lower the average value. Therefore, drum tracks can quickly lighten up the clip meter of a peak meter but produce comparatively little deflection on an RMS meter.

In Studio One, however, we get all the information we need. The blue Studio One meter represents peak metering, while the white line in the display always shows the RMS average level. Also important is where the metering (tap point) is tapped. For leveling out, the metering should show the pre-fader level ratios, especially if you already inserted insert plug-ins or analog devices into the channel. These can significantly influence the post-fader metering.
Keyword: Plugins
You need to drive digital emulations with a suitable level. There are still some fix-point plug-ins and emulations of old hardware classics on the market that don’t like high input levels. It is sometimes difficult to see which metering the plugins use themselves and where the line level is located. A screenshot illustrates the dilemma.

Fire Department Operation
It’s not uncommon that you will find yourself in the studio with recordings that just want to be mixed. Experienced sound engineers will agree with me. Many recordings by less experienced musicians or junior technicians are simply too high. So what can you do to bring the levels back to a reasonable level? Digitally, this is not a big problem, at least if the tracks are free of digital clipping. Turning the tracks down doesn’t change the sound, and we don’t have to worry about noise floor problems on the digital level either. In any DAW, you can reduce the waveform (amplitude) to the desired level.

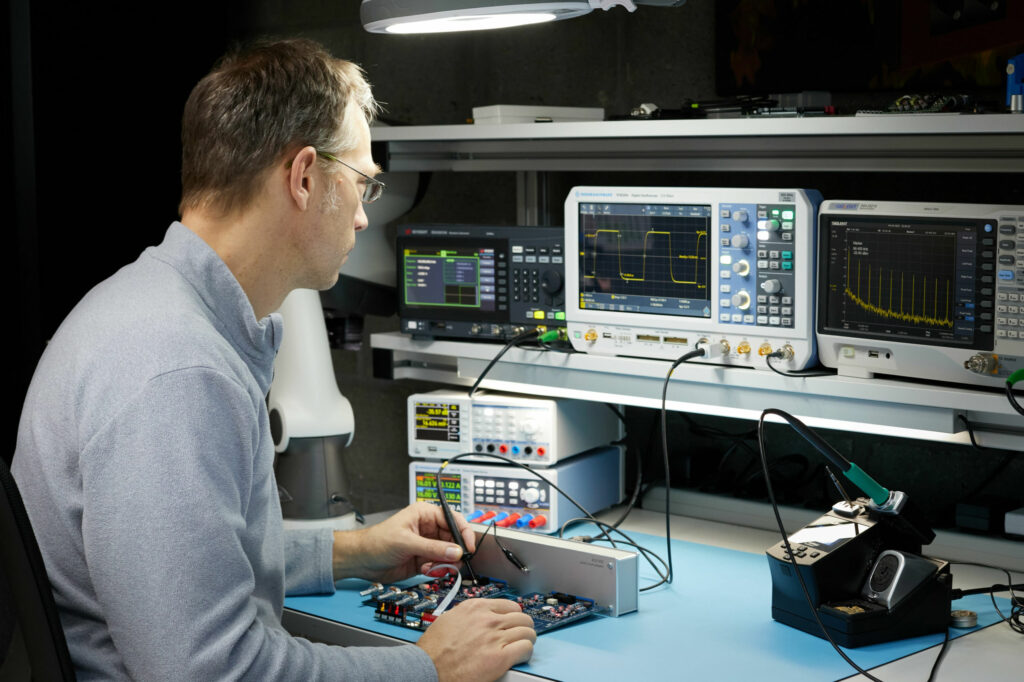
Analog gear in combination with a DAW
The combination of analog audio gear and a DAW has a special charm. The fast, haptic access and the independent sound of analog processors make up the appeal of a hybrid setup. You can use Analog gear as a front-end (mic preamps) or as insert effects (e.g., dynamics). If you want to connect an external preamp to your audio interface, you should use a line input to bypass the generic MicPreamp of the audio interface.
In insert mode, we have to accept an AD/DA conversion for pure analog gear to get into the DAW. Therefore the quality of the AD/DA converters is important. If you use the full 24bit spectrum by a full scale, this corresponds to a dynamic range of 144 dB. This overstrains even a high-end digital converter. Therefore, you need to drive your analog gear in the insert at line level to give the digital converters enough headroom. Especially if you plan to boost the signal with the analog audio gear.
This simply requires headroom. If, on the other hand, you only make subtractive EQ settings, you can also work with higher send and return levels. Now we only need to adjust the level ratios for the insert operation. Several things need our attention.
It depends on the entire signal chain
The level ratios in a DAW are constant and always understandable. When integrating analog gear, however, we have to look at the entire signal flow and sometimes readjust it. We start with the send level from the DAW. Again, i recommend you to send the send signal with line-level to an output of the audio interface.
The next step requires a small amount of detective work. In the technical specifications of the audio interface, we look up the reference level of the outputs and have to bring them in line with the input of the analog gear we want to loop into the DAW. If the interface has balanced XLR outputs, we connect it to a balanced XLR input of the analog insert unit. However, what do we do with unbalanced devices that have a reference level of -10dBV? Many audio interfaces offer a switch for their line inputs and outputs from +4dBu to -10dBV, which should you use in this case. In the technical specifications of the audio interface, you can find out which analog level is present at 0dBFS. This you can also switch in some cases.
On an RME Fireface 802, for example, you can switch between +19 dBu, +13 dBu and +2 dBV. It is important to know that many elysia products can handle a maximum level of about +20 dBu. This level applies to the entire signal chain from the interface output to the analog device and from its output back to the interface. Ideally, a line-level send signal with an identical return level will make its way back into the DAW. In addition, the analog unit itself is under observation. Make sure that neither its input nor its output is distorting. These distortions will otherwise be passed on to the DAW unadulterated.

Use Insert-Plugins!
A classic “send & return” connection. Depending on the buffer size setting, the AD/DA conversion causes a more or less large propagation delay, which can be problematic. Especially when we use signals in parallel. What does this mean? Let’s say we split our snare drum into two channels in the DAW. The first channel stays in the DAW and is only handled with a latency-free gate plugin, the second channel goes out of the DAW via Pipeline XT, into an elysia mpressor and from there back into the DAW.

Due to the AD/DA conversion, the second snare track is time delayed compared to the first track. For both snare tracks to play together time aligned, we need latency compensation. This you could do manually by moving the first snare track, or you could simply click the “Auto” button in Pipeline XT for automatic latency compensation. This is much faster and more precise. The advantage is that the automatic delay compensation ensures that our insert signal phases coherently with the other tracks of the project. With this tool, you can also easily adjust the level of the external hardware. If distortion already occurs here, you can reduce the send level and the return level will increase at the same time.
This is also the last tip in this blog post. The question of the correct level should be settled, as well as all relevant side issues that have a significant impact on the gain structure and a hybrid way of working. For all the theory and number mysticism – it does not depend on a dB exact adjustment. It is quite sufficient to stick roughly to the recommendations. This guarantees a reasonable level that will make your mixing work much easier and faster. Happy Mixing!
Here’s a great Video from RME Audio about Matching Analog and Digital Levels.

By loading the video, you agree to YouTube’s privacy policy.
Learn more
Feel free to share this blog post in your social media channels.
Yours, Ruben